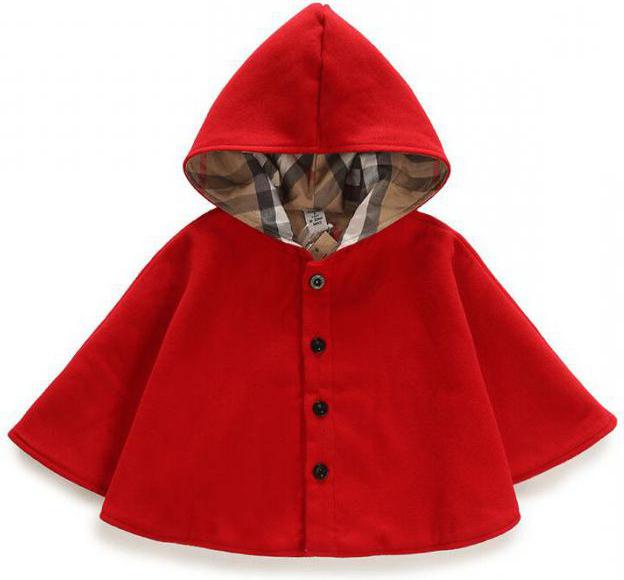
In the sewing business, any complicated thing is done onbased on the usual pattern. A complex model is constructed from a simple model, and various elements are added. At the output, you get wonderful shorts for the summer or the matinee. But to go on to sewing a complex model, it's worth starting with a simple one. Every next product will be better and better.
Working with measures
In order to build a pattern shorts forgirls, it is necessary to take measurements. In this case, you need to determine the length of the product and measure the circumference of the hips. Measurement is carried out on the most convex points. We will work with half the measures. If the hip circumference (OB) of the child is 54 cm, then we will work with the figure 27 (half of the measure).
In addition, ancillary calculations will be needed. For this, it is necessary to divide by 4 and 8.
- O / 2 = 27 cm;
- OB / 4 = 13.5 cm;
- O / 8 = 6.75 cm.
To build a pattern for shorts for girls, you still need to determine the length of the product (DI), for example, 30 cm.
Building a pattern mesh
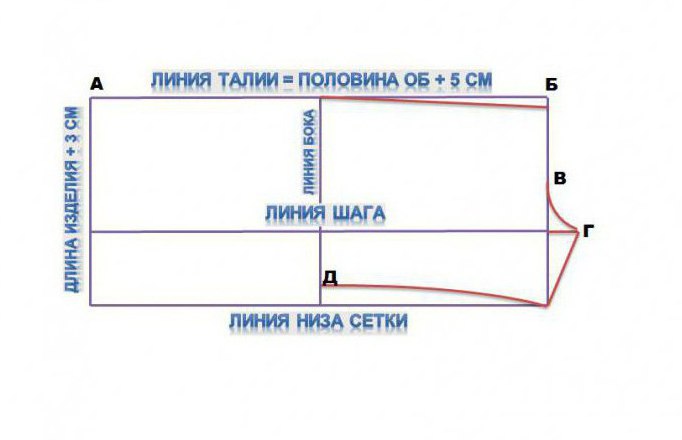
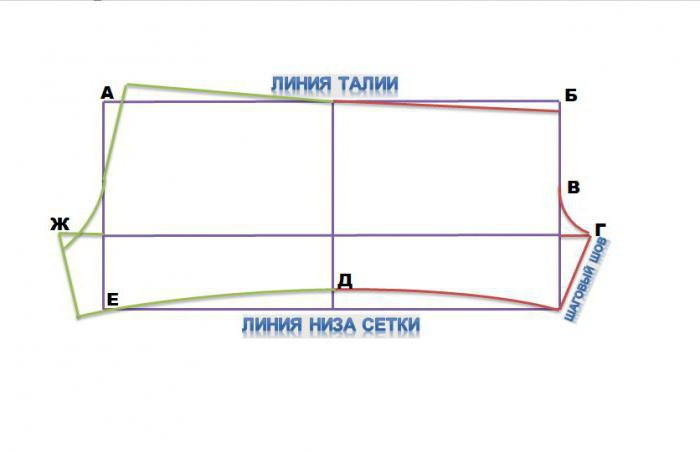
First of all we will build a shorts pattern forgirls. It is necessary to build a grid of blanks. To do this, we draw the waist line (AB). It is equal to half the OB plus a few centimeters for freedom of clinging: from 4 to 9 cm.
To cling add a fewcentimeters, so that the shorts are free. When squatting, they should not break at the seams. The freer the shorts, the more given to freedom of clinging. We will add 5 cm.
AB = 27 + 5 = 32 cm
The waist line (it is equal to OB + 5 cm to fit)divide by 2. Note that the waist line and waist circumference are two different concepts and here we do not work with a measure of waist circumference. From all three points down we measure 3 + 3 cm for a 30 + 3 = 33 cm bend. The vertical line in the middle of the grid will become the side lines.
All the bottom points must be connected with each other - the resulting line will be the bottom line of the grid.
The next stage in the construction of the grid will be the markof the step, it is laid down from the marked waist at a distance equal to OB / 2 - 6 cm, i.e. 27 - 6 = 21 cm (see the diagram below). Such a dimensional grid roughly corresponds to shorts for a child of 5-7 years. Shorts for girls 12 years are sewn the same way, but with the other OB (about 70 cm).
The step line (LS) is carried out horizontally, it is parallel to the waist line (LT) and parallel to the bottom line (LN) of the net (located between LT and LN).

Building a pattern of transmission
To make the waistline in front, it is necessary to lay down 1 cm from point B and draw a new waist from the top point along the barrel to the point 1 cm.
Line of the front seam is built on the right sidegrid and goes beyond it. On the auxiliary label, we postpone 13.5 cm upwards (these are auxiliary measures which we have in calculations), we obtain the point B.
To the side of the step line, lay 6.75 cm and get the point D. Points B and D must be connected by a smooth mark. The point Γ is connected with the lower right point in the corner of the grid - this is the line of the step.
Now we work with the lateral segment. From the bottom up we put three centimeters - the point D. It is also connected to the right point along the grid line from the bottom. The front half of the pattern shorts for the girl is ready.
Backrest construction
Under such a scheme, you can sew shorts for a girl of 12 years, on small children and even on a teenager. The algorithm is the same, only the measures change.
We build the bottom line of the back half of the shorts. We draw a smooth mark from the point D to the point E and draw it farther away from the point by 3.5 cm.
To the left we extend the step line by 13.5 cm (auxiliary measures), mark the point G. We connect this mark with a straight line with the bottom line.
Seat marking is constructed in this way:from the point A downwards we lay off 10 cm, and on the right side 3 cm. Through the obtained sections we draw a line. At the top, extend it by 3 cm, and connect it to the bottom of the bottom below, but 1 cm shorter.
To make a belt line, you need to connect the top point of the step and the top point of the seat line. This pattern is ideal for sewing summer shorts on an elastic band.
Working with a pattern
With a pattern in this form, you can already work. If desired, you can cut it on the lateral line, then the details of the transfer and the task will need to be issued separately.
If the pattern is not cut, it is necessaryfind only two parts. To do this, the fabric folds in the face to the inside. In this case, the line of the side must pass strictly along the share strand. The part is cut out with allowances on the sides and at the top mark. Knitted shorts are most often sewn on an elastic band. Therefore, for it, you need to put up 3 cm of allowance on the wings.
At the bottom of the product, it is enough to add 3 cm to the hem. In our case, we have set this allowance when constructing the grid. But you can add this length to the finished pattern. This option is also correct.
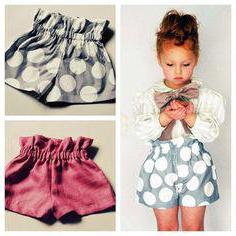
Ornaments on girl's shorts
Simple shorts for the boy - this is normal. But the girls are big ladies and from the youngest age they admire the mirror and want to put on beautiful things.
To add beauty, there are many options. You can decorate the product with simple elements and complex ones.
The simplest option would be to usestripes. In the fabric stores there are departments in which a lot of wonderful things are sold. If you go there for a tour, then 100% will be able to find for yourself what you need. Among these options there are sewn flowers, cute little animals, fruktiki and vegetables. Such stripes have a size of 3-15 cm, so that it will be possible to pick up suitable stickers and a drawing according to the parameters of the shorts.

If you decide to sew knitted shorts, then on themit is better not to make extra strips, the fabric stretches during the laying of the stitch. If the line goes unevenly and will need to be thinned, then after the needle there are large holes. Sometimes a thread breaks and there remains a torn mark, from which the arrow can go. But shorts made of knitwear can also be decorated, for example, with stickers made of stones. Previously, the decor had to be laid out separately by tweezers individually and to make up a drawing. Today, you do not need to do this, you can buy a finished product made of stones on a transparent basis. On pebbles there is a special glue, which melts from the temperature, and the pattern is well adhered to the fabric.
And one more simple variant is at the bottom of the shortsto sew an openwork braid. The choice of flowers is huge. You can choose braid and to monophonic fabrics, and to fabrics with drawings. It is possible to sew a ruff from the remains of a fabric below. Such an element will decorate the product well. With such a simple decor, even the simplest shorts will look original.