In our time, the industry produces a lotbuilding materials suitable for interior decoration of premises. And among them is especially popular drywall. It is well suited for wall finishing and for partitioning. Using plasterboard, you can easily mount a standard single-level ceiling. Figured ceilings from plasterboard also look beautiful. This material is cheap enough and it can be easily processed. And so it is not necessary to hire specialists for such works. Having some skills and a set of necessary tools, you can make ceilings from plasterboard with your own hands.
And this work should begin with a mark-up of the futureceiling, which is performed on the wall and goes around the perimeter of the room. Marking is done with the help of a level, a hydraulic level and a cordstitch device. The level should be long enough, not less than one and a half meters. Also now often use the laser level. They can make markup more quickly and accurately. First you need to determine the distance between the new and the old ceiling. It should not be less than five centimeters. And if you plan to install spotlights, then you can still safely add three centimeters.
Now we need to find the lowest angle, measurethe right distance and start marking. Should be a smooth horizontal line along the entire perimeter. And if the markup is done correctly, then its beginning and end must converge. Now we need to decide on the configuration of the ceiling structure. Smooth ceilings of plasterboard with their own hands to do the easiest. You can also make a few steps at the corners of the ceiling or make a rounding. But if the size of the room is not too big, then it is not worth overloading the ceiling with a set of complex elements.
Now that the markup is done and the plan is readyfuture "creation", you can start to screw the starting profile. It is fastened with quick-mounted dowel-nails or similar fasteners around the perimeter of the room. To improve sound insulation between the wall and the profile, you can glue the sealing tape. Now you can mount the rack (ceiling) profile. If the width of the room does not exceed 2.5 meters, then too complicated a construction is not needed.
And these profiles are attached every 60centimeters. To do this, use the tape measure to make marks on the side guides. Then mark out and cut off the required number of racking profiles. Their length should be equal to the width of the room minus one centimeter. Then these profiles are filled into the lateral guides so that their center converges with the previously marked labels. And they are fixed with the help of self-tapping screws for metal and press-washers. But if the width of the room is quite large, then in one row it will be necessary to mount two or more ceiling profiles. For this purpose, special connectors of two types are sold, which are designed to connect two and four pieces of the profile.
The basic construction is ready, and now it should bemake it more rigid, otherwise it will "play" and appear on the ceiling cracks. And this is done with the help of vertical hangers. The distance between the suspensions should not exceed one meter. Ideally, 70-80 centimeters will be enough. And fasten these hangers as close as possible to the joints of the profiles. Rack profiles to the hangers are fixed with self-tapping screws for metal. So, when creating a rigid framework, you will get reliable and even ceilings from gypsum board. With your own hands, everyone can do this.
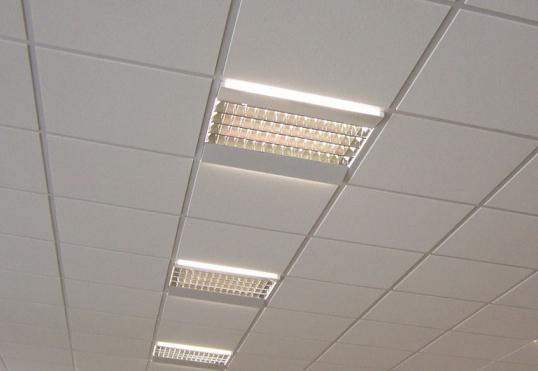
But before you start to mount the sheetsdrywall, you should pay attention to lighting. If it is a chandelier, then a pair of profiles should be added to the installation site, since the panels can not withstand its weight. And if the room will be illuminated by spotlights, then the holes in the sheets of drywall can be made using a crown. And do not forget about the wiring for lighting. It should be worn for reliability in a corrugated hose.
And now about how to sew the ceiling with plasterboard.Panels are marked and cut with a regular clerical knife. On the layout of drywall sheets, too, should pay attention. After all, if you do it right, you can reduce the amount of waste and save material. The sheets are fastened around the perimeter with special self-tapping screws. The gaps between them should be within 10-12 centimeters. To screw the screws, a screwdriver is used, and the head of this screw must be buried in the sheet to a depth of one millimeter. Then the joints between the panels are pasted with a serpent to avoid the appearance of cracks. Then the fine sandpaper is taken and with its help the joints are brought to ideal smoothness. Now you can apply a primer, and then paint. In this way, ceilings are made from plasterboard with their own hands. They have an ideal smoothness, environmentally friendly and decorate the interior of any room.