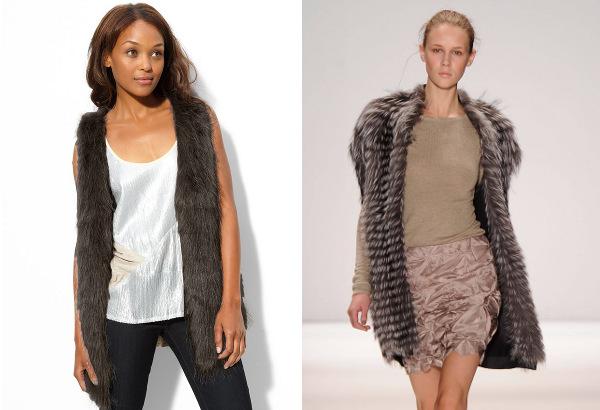
Today we sew a comfortable and beautiful fur vest.The pattern is made with reliefs, so in the end the thing will ideally fit the figure. Our waistcoat will require a lining. It is better to do it yourself, quilting together the silk satin and the base of a thin woolen drape.
You need to know the measurement of the circumference of the neck, chest, waist and hips, the widest place of the arm, the length and width of the back, the length of the shoulder, the height of the chest, the distance between the tops of the chest.
- We build an auxiliary grid on whicha vest pattern is drawn. First, draw a rectangle AA * BB *, where AA * = BB * = chest circumference / 4 + 4 (horizontal lines) and AB = A * B * = back length + 20. Inside it draw a horizontal line of the chest, located from the top in the distance AC = A * C * = chest circumference / 6 + 5; and the waist line at a distance AD = A * D * = the length of the back.

- From the chest line, you need to spend a few moreauxiliary. Those of them that limit the width of the armhole, we will call EF (on the back) and E * F * (on the shelves). EF is at a distance AE = CF = the width of the back + 1 from the left edge of the rectangle, and E * F * is to the right of EF at a distance EE * = FF * = chest circumference / 8. Find the middle of the segment FF *, let it be the point X. Draw from X down to the end the line XX *, and the vest pattern will be divided into halves for the transfer and back. From the chest line, climb up the EF by 5 cm (point G), and by E * F * by 4 cm (point G *). By connecting points G, X and G * with a strongly curved line, you will get the lower part of the armhole.
- Draw the cutout of the neck.To do this, from the point A *, draw down and to the left the segments A * I * = A * J * = the neck circumference / 6 + 0.5 and connect the points I *, J * by the sector of the circle. From the point I *, lying on the line AA *, rise vertically by 2 cm and put the point H *. The curve H * I * J * is the neckline.
- Leave from the point I * to the left horizontally 4 cm andput K *. Connect H * and K * oblique straight - this is a piece of the shoulder from the neck to the dart (then we turn the darts into reliefs). In the same place, on the line AA *, put the point L * from the point K * at a distance K * L * = the chest circumference / 12 - 1. From K * down to the line of the chest draw the vertical segment K * M *. On the inclined line L * M * draw the segment M * N * = M * K *. We got a shoulder dart passing over.
- Плечо переда дорисовывается на наклонной линии N * C. Set it 10 cm to the left and drop after that 1 cm down. Put the point O * and connect it to N *. Curve G * O * you will draw the upper half of the armhole pass.
- On the back of the vest pattern is built like this. To cut the neck, move away from point A to a distance equal to A * I *, and then go up 1 cm up. Put point I and connect it to A smooth curve.

- Now shoulder and dart.First, along the EF line from the point E, move 1 cm down and connect the resulting point (denoted by its Y) with I. Along the line IY, move to the right 4 cm, put the point K. 2 more to the right, put the point N. Down the vertical from K, the segment KM = 8 cm. Through M and N, draw a section ending 0.5 cm above N. Mark its end with point L. The KML angle forms the back dash. Through LY we draw a segment of 10 cm in length, marking its right end with the point O. So you draw the shoulder. A curve OG paints the armhole.
- We now turn to the construction of lateral sections.From the vertical XX * on the waistline, step back 1.5 cm in both directions and put the points Q and Q *. Connect the two points straight with X. On the BB * line from the middle of the back, step back to BR = the thigh circle / 4 + 2, from the middle to the B * R * = hip / 4 + 3. The QR and Q * R * lines will look as arcs; they intersect with each other on the drawing, so the details of which the vest pattern is composed, then it is necessary to transfer separately to another sheet of paper. From point B *, move vertically downwards 2.5 cm, from point B-2 cm. With a smooth line connect these lowest points on the pattern with R * and R, respectively.
- Остались только вытачки на талии.The centers of both darts are located on the line DD *, at a distance of 8 cm from the middle of the back and forward. On the pattern, transfer 2 cm backwards in both directions horizontally, 14 cm up and 16 cm down. On the pattern of the backrest - 1.5 cm in both directions and 14/16 cm up / down. Connect the dots to draw darts. Now connect the corresponding dart tops at the waist and on the shoulders, and from the bottom points of the darts at the waist, lower the verticals down. On them you will cut reliefs.

A vest of fur is ready!Further, as real tailors, we will make a fitting sample from an inexpensive fabric and adjust it to the figure. It was possible to act differently and tell what changes are made to fit directly onto the pattern, but the fitting option still remains the most reliable and simple. When you are sure that the pattern is sitting well on the figure, proceed to the cutting of the fur.