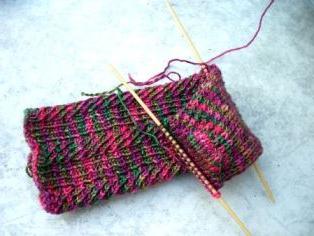
In winter, it is necessary to keep the handles warm in the street.Why not put on them mittens? There are many variations of this product, they vary depending on the color, patterns, pattern. If you know how to tie a mitten with knitting needles, you can pass the time on a long journey, at the TV screen, waiting for your turn in the clinic to the doctor. Knitting is also very relaxing and soothing the nerves, so it is also useful.
How to tie a mitten with knitting needles to make it easy, but at the same time beautiful

If you pay attention to the picture, you can see thaton the mittens are braided braids, which look very impressive. Create a picture is not difficult. About how to do it, will be told a little later. In the meantime, you need to start an exciting process of creativity with the preparation of threads and spokes. It will take only 50-100 grams of yarn, depending on its thickness and product size, and 5 identical spokes.
It would be nice to first link a small sample,then measure the girth of the hand and calculate the number of loops that need to be typed. It must be a multiple of four. Suppose we got 40 loops. First they are typed on two spokes folded together. Then knitting is turned over and knit the second row with an elastic band, transferring the work to 4 knitting needles. You can alternate one or two loops with the front and the back. Thus, a knot is about 5 cm. Here's how to knit the mitten with knitting needles, starting from the very beginning.
We fix the thumb

If the needlewoman is not yet strong in thisart, then for a start you can associate such original mittens, as in the photo. It is enough to make a hole for the thumb, to tie up the rest of the fingers, close the hinges and flaunt. However, Russian winter frosts are unlikely to forgive such frivolity, and fingers are frozen. In the autumn it is quite possible to be like such things, of course, if you know how to tie a mitten with knitting needles. To perform a complete product you need to have an idea of how to tie a finger.
After the "rubber band" pattern, tie another 6 cmto the thumb. The hole for it is made on the spoke, which is located on the left side of the palm. The first loop on it is tied, and the remaining 5-6 are taken off the pin, a row is pierced further. The next row: above the place where the loops on the pin are located, the same number of air loops as many are mounted on it. Again, the series is fastened and those loops are already knitted further according to the drawing. When the product is finished, then on the edge of the finger hole, the required number of loops is typed, a finger of the required length is knit. For 3 rows to the end through one knit 2 loops together. The two last join, thread through them stretch, fasten and cut. Finger ready.
How to tie mittens with knitting needles with a pattern

If you want to make a picture on the mittens, then itstoo easy to untie. You can use it ready or draw it on a piece of paper. For example, it shows a section of loops 10x10. From above you can draw a heart (as in the photo). Let's say the base is knitted with a gray thread, and the drawing is pink, looking at the diagram. It will be clear where to tie a different color.
You can create and drawing "Spit".For this, 3 loops are removed, the next 3 are knitted, then the removed loops are again put on the left knitting needle and also knitted. Four rows perform the front satin stitch, and then again according to the scheme.
When 6 rows left until the end, beginknit 2 needles on each spoke together and close the last 2, threading the thread in them and tightening it. It is easy to knit mittens with needles in the same way.


