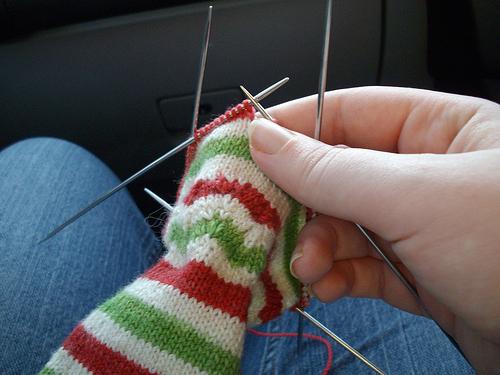
A beginner knitter can be recommendedto make socks on 2 spokes without seams. This method is simple, because you do not need to hold five needles at once. In addition, if socks are made on 2 spokes without seams, the craftsman can use a variety of relief patterns. Many of them are inaccessible with circular knitting.
Calculation of the number of loops
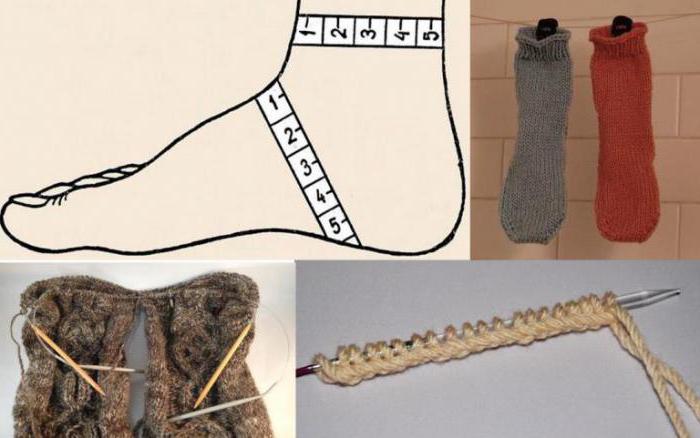
Before knitting socks on 2 spokes without seamssmall calculations should be made. To do this, measure the shank volume. Then knit a small sample piece from the yarn and the pattern that will be used in the work. Measuring the width of the resulting canvas, do the calculations.
- The number of loops in the sample is divided by its width in centimeters. The result may not be an integer. The average number of loops in one centimeter is obtained.
- The volume of the shank is multiplied by the result of division.
- The last digit is divided once again into two.After all, socks on 2 spokes without seams begin to knit from the bottom halves. During the mating process, it is converted to the top of the product. And only then both parts are combined into one product.
So, the calculation is done. Let's say the number is 23.8. It needs to be rounded to the whole and add 2 more edges. This results in 26 loops.
Here will be an instruction how to tie socks on 2 spokes without a seam for beginners. Therefore, the manufacturing algorithm is proposed without the use of relief patterns.
Step-by-step instruction on how to start knitting socks to the heel
- We type on the needles the required number of loops.
- To the socks on the 2 spokes without a seam fit well the shin, usually the top is carried out with an elastic band. Its height can be arbitrary.
- Now you need to perform the front surface to perform a backpart half to heel. If the socks on 2 spokes without knitting are knit on children, then it is sufficient to tie the canvas to 4 or 5 cm. For adult products, it is larger: from 7 to 9 cm. Usually the length is chosen according to the size of the foot.
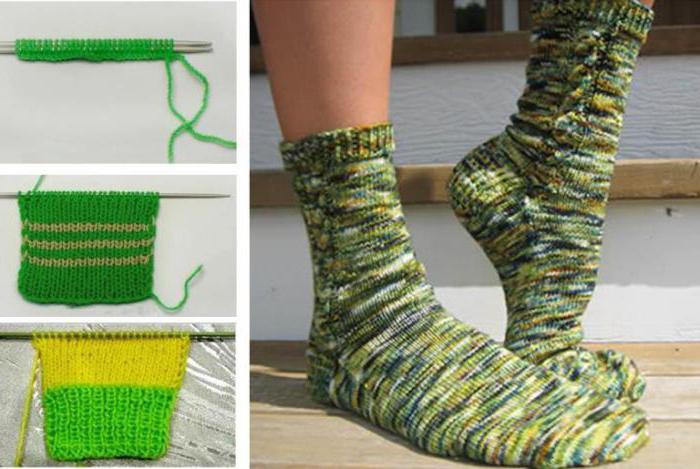
So, the initial stage of knitting of socks on 2 spokes without seams has been completed.
Master-class knitting of the heel. Method one
This variant of heel-out is based onThe fact that in each row there remains a non-tied loop. The product is turned to the other side. In the next row, another one is added to the already left unbonded loop. She, too, does not bother.
Such an algorithm is maintained until 12 (for a product per adult) or 6-8 loops (for children's socks) remain in the middle (in the working part).

Then begin at the end of each row to grab and tie one loop from the left. So do until all the loops are back in work. Thanks to these actions, a heel is obtained.
Beginners can help to understand how to knit socks on 2 spokes without a seam, the scheme shown in the picture. It is supplemented with photographs of this process.
Master-class knitting of the heel. Method of the second
This option is also based on two stages.First, there is a decrease in the loops in the first half of the work on the heel. Then they are added in the second stage. Only reduce the number of loops, tying one of the two, at the beginning and end of the facial rows. Kromochnye formalized in the usual way.

When the work will remain 12 loops (6-8 forbaby socks), begin to perform addition. To do this, at the end of each row, you should additionally knit a loop from the edge band about which the decrease was made.
Master class of knitting a sock after the heel
Whichever way he chooses to perform the heel, the work algorithm is almost always the same.
- Knit facial smoothing foot.The length is determined by applying the product or calculation. This will require a sample again. It must be measured now in height. The number of rows divided by centimeters. Get a number, not necessarily an integer. This is the arithmetic mean of the number of rows contained in one centimeter of mating. Then it remains only to multiply this number by the length of the foot to the middle of the little finger. It turns out the number of rows from the middle of the heel to the beginning of the formation of the toe of the product.
- Now subtraction and addition is performed again.loops. The algorithm is very similar to the one used in the heel. However, in this case, a decrease and an addition are made in each row at both ends of the row. When tying the heel it was done only in one edge. As a result, the sock is not so voluminous. It is flatter, and its side sections are steeper.
- When the nose of the product is formed, continue to knit.top of the foot facial surface. In each row you need to knit the extreme loop together with the hem of the bottom of the foot. So the details will be interconnected seamlessly.
- Closer to the heel width of the canvas need a littlezoom in to lift. To do this, it is enough to knit some of the lower edges of the foot separately, and not together with the last loop of the upper part. It is enough to add 4 loops on the average foot. For the manufacture of socks with a higher rise, you can add 6.
- In the same way knit gum - with hinging edge loops.
Knitting socks with an oblique front
For more experienced craftswomen can offeroption using a relief pattern. For example, socks on 2 needles without a seam with a braid look great. Of course, they can no longer be worn in shoes. But poforsit home in such exquisite knitted boots - a pleasure!

There are, of course, plenty of ways to tie suchextravagant thing. But the easiest is this option. The master performs the model using one of the algorithms described above, before mating the upper half of the front part. Here, instead of the usual canvas with a facial satin stitch, he knits the embossed pattern that he likes the most.
Here it is worth considering the fact that many drawings narrow the canvas. Therefore, in some cases, you will need to add loops, so as not to reduce the volume of the toe.


