The quality of a hand tool is one of theimportant criteria for its evaluation when choosing. A practical, convenient and reliable tool significantly increases labor productivity, facilitates the process itself and eliminates the possibility of injury. This is especially true for a tool such as an ax.

Its use provides forintensive dynamic load, characterized by a special traumatic danger. When the inept use of the gun, the ax often flies from the handle and traumatizes the worker. To prevent this, it is necessary first of all to learn how to plant an ax on an ax handle.
About varieties
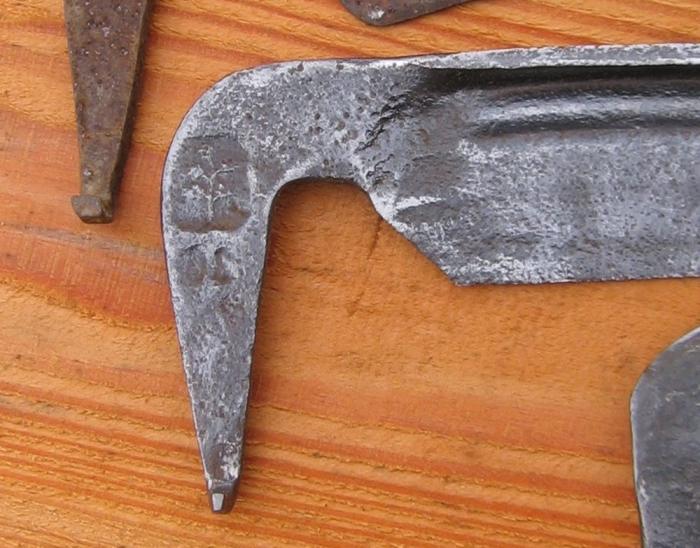
Today there are about ten varieties of cutting tools. And before you put the ax on the ax handle, it is necessary to determine to which it relates to the type:carpentry, combat, tourist, or it is a tool of a woodcutter. Although all axes consist of a handle and a metal part, each type of gun is distinguished by its function and design features. To each apply special advice on how to properly plant an ax on the ax handle. The photo below, for example, represents the features of fastening the metal part to the handle in the carpenter's ax. In other types of guns, it is somewhat different.

How are the axes fastened?
There are several methods for attaching the handle to the metal part:
- Welding. Provides reliability and strength of the tool.
- Production of an ax in the form of a single implement. Characterized by rigidity and strong impact.
- The method of gluing in a special chamber with the help ofepoxy materials. Polymeric materials are used for axes, which are difficult to glue together at home. Such work requires drying chambers.
- Push the metal part onto the handle with further wedging. This method of connection is considered the most ideal for doing at home.
For successful performance of work you need a good qualification, time and an idea of how to plant an ax on an ax handle. The most With this you can cope with the availability of skills andnecessary tools. In case of failure, if the metal chipping section is unreliable on the handle or the structure is loosened over time, the setting and wedging procedure should be repeated again.
How to plant an ax on an ax handle?
Despite the apparent simplicity of the connection athelp planting and wedging, it is not easy to carry out this work. It has its own nuances, which should be taken into account. To facilitate the process, professional carpenters are recommended to follow a step-by-step instruction that contains the following steps:
- preparation for work;
- the manufacture of steel and wood products for wedging;
- nasazhivanie and wedging.
Recommendations of experts will help the novice to understand how to plant an ax on an ax handle.
Start. Preparatory stage
Before you start, you need:
- Acquire an ax handle.As a material for its production, according to experienced carpenters, dried birch is ideal. This tree is very popular, because it has all the necessary properties for this. When choosing the handle, account must be taken of the thickness of the product and its shape.
- It is recommended to check the ax handle for conveniencegrasp. Ignoring this aspect will lead to the necessity during the cutting to perform unnatural compensating force movements, and this, in turn, is fraught with quick fatigue.
- Fit the acquired ax handle to the eyeax. The job is to cut the handle to the desired shape (straight or conical) with a knife or other woodworking tool. Eyes with a conical shape are considered the best, as they provide a very reliable fastening.
- Make a cut at the top of the handle.This work is done at the end. Propyl is a longitudinal groove, which is performed with a hacksaw on the tree. You can make one (along the end) or several cuts (three side and one longitudinal). It depends on how the ax chooses to plant the ax. According to professionals, the most effective is the sawed longitudinal with four side. An important nuance at this stage is the width and depth of the cut. The resulting groove must necessarily be hidden in the lug, otherwise when the wedge is disengaged or when the ax is used, its handle can split. The width should correspond to the thickness of the wedges. But at the same time, they should not be included in the cuts as too easily (the procedure of sawing loses its meaning), and tight, as this may entail splitting an ax handle.
- Before you put the ax on the ax handle, you need to align the blade axis and the axis of the handle in one plane.

Preparation of wedges
A reliable fastening of the cutting element with a handle is possible provided that the wedge is of high quality. For this, the master will need wooden and metal wedges.

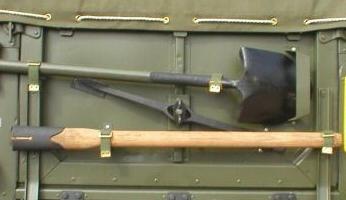
They can be purchased at a hardware store ormanufacture by yourself. The shape and dimensions of the wedges must correspond to the type of cut and the material from which the ax handle is made. For a wooden wedge, the wood of dried birch is suitable. For a metal product suitable hard tin (shovel).

Piling
Often novice home masters ask questions: how correctly to plant the ax on the ax, how to hammer wooden and steel wedges?
Padding is a simple process. This work should be started if the handle and wedges have already been fully prepared.
The first to score is a longitudinal wedge.This is done with light hammer strokes. Strong knocking is undesirable, since it can flatten the tree, reducing the stability of the connection. After the wedge is filled with propyl, the remains must be carefully cut using a hacksaw blade. The work is considered successful if, during testing, the ax attached to the handle is held tight and does not stagger.
Propagation
According to the beginner's persuasion, wooden wedges should be from the same tree as the ax handle. But this is not so.
- First of all, the wood must be strong.
- It is also necessary to consider the direction of the fibers.It must be parallel to the narrowing of the wedge. This direction will prevent the breakage of the latter when driving into propyl. A broken wedge does not fulfill the qualitative opening of the ax handle to the sides. Successful wedging is considered when the wedge has filled completely the whole space of the cut and it can not be removed.
- When making wedges, it is important that the dimensions of the cross pieces correspond to the size of the eyelet.
- In some cases, the eyelet may have clearances.They can be corrected with a gauze or bandage impregnated with epoxy resin. Epoxy material protects the wood from wetting and performs a reinforcing function. To perform the reinforcement it is necessary to wind several layers of gauze around the upper part of the handle before inserting the ax. The resin is poured into the cuts and fills all the existing voids and cracks. After its hardening, the wedges are clogged. At the same time, the first ones are driven by wooden, and afterwards by iron wedges. The distance between them should be at least 0.3 cm. The iron wedge at the end of one edge is bent to cover a wooden.

Which side is the ax to be pinned on the ax?
The features of ax mounting depend on itform. For standard Soviet-made products, the conical shape of the cutting part is characteristic. This reinforces its wedging qualities and eliminates mistakes when nesting on the handle.
According to the rules, you need to put on an ax in such a way,so that the wedge and end of the handle protrude beyond the eye by 0.5 cm. This is possible if the ax is planted with its narrow part towards the wedge, and wide - towards the ax. With this planting, the worker can, if necessary, plant the loosened chopping piece back into place, tapping an ax with something hard. After that, you need to re-score the wedge, but already deeper.
In carpentry, the reverse is often usedlanding the ax. It is necessary in those rare cases, if the ax is not used as the main tool, but as an auxiliary tool to grind something or plan it. The reverse nozzle method is mainly used for sledgehammers and cleavers. For them, wedges are not provided. All the load goes to the extreme part of the handle, which holds the metal part of the ax.
In conclusion
Depending on the shape of the metal chipping part, it is decided which side to put the ax on the ax handle. It is important that the instrument is comfortable and ergonomic at the same time.

Following the step-by-step instructions, you can quickly prepare the ax to work independently.