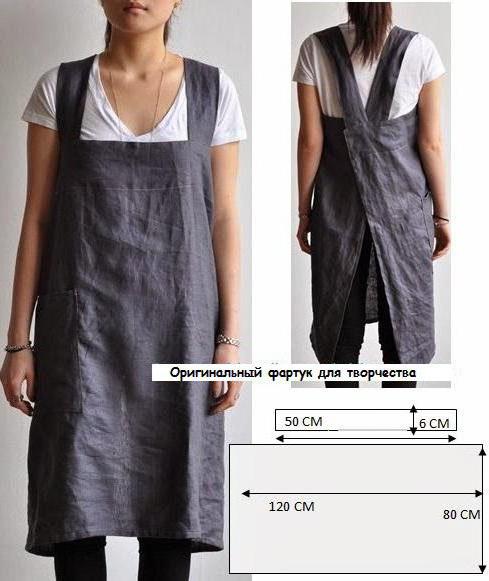
Depending on the destination, apron patternmay be different. The simplest option is an apron without a bib. It is enough to trim a rectangular piece of fabric from three sides, and from the fourth side to sew strings of suitable length. But an apron with a bib is much more beautiful and functional, and on the basis of such a pattern you can sew a wide variety of models.

School apron, pattern for size 42
It is necessary to take three measurements:
- Waist circumference (68 cm).
- Hem length, optional (we have 53 cm).
- The length of the straps. The measuring tape should be slung over the shoulder and the distance from the waistline in front to the waistline behind (72 cm) should be measured.
Draw a rectangle with sides of 53 cm (lengthhem) and 22 cm (waist circumference / 4 + 5). It will be half the bottom. Mark on the sheet where you will have the waist line, and where - the hem of the apron. Turn the sheet so that the waistline is at the top and the hem is at the bottom. Then the side line will be on the right, and the middle part, along which the bend of the halves passes, on the left.

Go to the drawing of the hem.From the lower right corner of the rectangle you need to put 4 cm to the right, then 1 cm upwards. Connect the resulting point with a straight line to the upper right corner of the rectangle, smooth arc to connect the same point with the lower left corner of the rectangle. Pattern apron at the bottom is ready.
The bib looks like a trapezoid. Its height is 13 cm, width in the upper part is 12 cm, in the lower part - 10 cm.
The straps are 72 cm long (as measured) and 16 cm wide. They are sewn along folded lengthwise.
The belt can be made in different ways. If you make a belt on a fastener, its dimensions are 72 cm in length (waist circumference + 4 cm) and 5 cm in width. If you want to tie a belt, approximately double the length.
Pocket size is 10 by 10 cm.The upper right corner of the pocket is located at a distance of 7 cm down and 5 cm to the left of the upper right corner of the pattern. If you wish, you can make two pockets, but since the school apron is now sewn only smart, pockets on it are optional.
Pattern apron is ready, now a few words abouthow to cut and sew it. First, do not forget about the seam allowances: 1.5 cm in the place of grinding two panels, 2-5 cm in the place where the fabric is bent. For the belt, cut two pieces.


